Set up your first shrimp tank the right way. Covers species selection, cycling, substrate, plants, and Singapore-specific water tips for healthy shrimp.
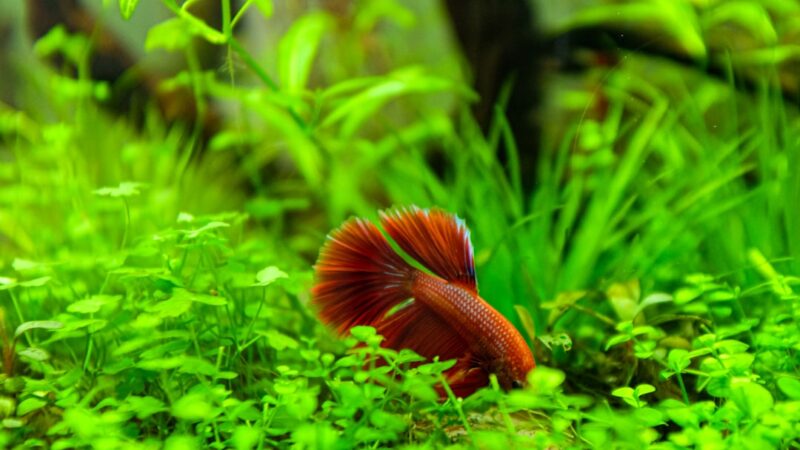
Set up the perfect betta fish tank with this step-by-step guide. Equipment, plants, cycling, and Singapore-specific tips for a thriving betta aquarium.
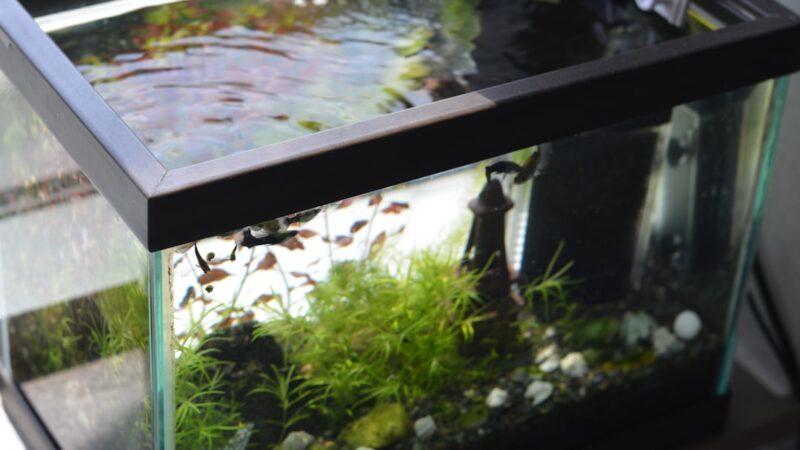
Learn how to cycle a new aquarium step by step. Covers fishless cycling, bacterial starters, planted tanks and Singapore-specific tips for faster cycling.\nCONTENT:\n<article>\n\n<p>Every new aquarium, no matter how beautiful, is a biological wasteland. The water is sterile. The filter media is bare. There are no beneficial bacteria to process the toxic waste that fish produce. Adding fish to an uncycled tank is one of the most common and most preventable mistakes in the hobby — and it is the leading cause of fish death in new setups.</p>\n\n<p>Cycling is the process of establishing colonies of beneficial bacteria that convert toxic ammonia into less harmful substances. It is not optional. It is not something you can skip with a magic product. But it is straightforward once you understand what is happening and what to look for.</p>\n\n<h2>The Nitrogen Cycle Explained</h2>\n\n<p>The nitrogen cycle in an aquarium works in three stages:</p>\n\n<ol>\n <li><strong>Ammonia (NH3/NH4+):</strong> Fish produce ammonia through their waste and respiration. Decomposing food and plant matter also release ammonia. At any detectable concentration, ammonia is toxic to fish — it burns gills and damages organs.</li>\n <li><strong>Nitrite (NO2-):</strong> A group of bacteria called <em>Nitrosomonas</em> colonise your filter media and convert ammonia into nitrite. Nitrite is also highly toxic to fish — it binds to haemoglobin and prevents oxygen transport in the blood.</li>\n <li><strong>Nitrate (NO3-):</strong> A second group of bacteria called <em>Nitrospira</em> convert nitrite into nitrate. Nitrate is far less toxic and is tolerated by most fish at concentrations below 40 ppm. It is removed through regular water changes and is absorbed by live plants.</li>\n</ol>\n\n<p>A \"cycled\" aquarium has enough of both bacterial colonies to process ammonia and nitrite as fast as they are produced, keeping both at zero. This is what you are building during the cycling process.</p>\n\n<h2>Fishless Cycling: Step by Step</h2>\n\n<p>Fishless cycling is the most humane and reliable method. You introduce an ammonia source without any fish present, allowing bacteria to establish before any livestock is at risk.</p>\n\n<h3>What You Need</h3>\n\n<ul>\n <li>Your fully assembled tank with filter running, heater set (if applicable), and substrate in place</li>\n <li>A source of ammonia — pure ammonia solution (Dr Tim's Ammonium Chloride is formulated specifically for this purpose) or fish food (less precise but works)</li>\n <li>A liquid water test kit that measures ammonia, nitrite, and nitrate (API Freshwater Master Test Kit is the standard)</li>\n <li>Water conditioner to dechlorinate your tap water</li>\n <li>Patience</li>\n</ul>\n\n<h3>Step-by-Step Process</h3>\n\n<ol>\n <li>\n <strong>Set up and fill your tank.</strong> Install your filter, heater, substrate, and hardscape. Fill with dechlorinated tap water. Turn on the filter and let it run — the filter must operate continuously throughout the cycling process. Remove any carbon or chemical filtration media, as these can interfere with the cycle.\n </li>\n <li>\n <strong>Add ammonia to 2 to 4 ppm.</strong> If using pure ammonia solution, add drops gradually and test until your ammonia reading reaches 2 to 4 ppm. If using fish food, add a small pinch and allow it to decompose over a few days — it will produce ammonia as it breaks down, though the exact concentration is harder to control.\n </li>\n <li>\n <strong>Test daily.</strong> Each day, test for ammonia, nitrite, and nitrate. Record your readings. For the first few days, ammonia will remain high and nitrite will read zero — this is expected.\n </li>\n <li>\n <strong>Watch for the nitrite spike.</strong> After approximately 5 to 10 days (faster in Singapore's warm water), you will see ammonia begin to drop and nitrite begin to rise. This means <em>Nitrosomonas</em> bacteria are establishing and converting ammonia. The nitrite reading may climb very high — 5 ppm or more. This is normal.\n </li>\n <li>\n <strong>Re-dose ammonia if it drops to zero.</strong> If ammonia falls to 0 ppm before the cycle is complete, add more to bring it back to 1 to 2 ppm. The bacteria need a continuous food source to multiply.\n </li>\n <li>\n <strong>Wait for nitrite to drop.</strong> Eventually, <em>Nitrospira</em> bacteria will establish and begin converting nitrite to nitrate. You will see nitrite readings begin to fall while nitrate readings climb. This is the home stretch.\n </li>\n <li>\n <strong>Confirm the cycle is complete.</strong> Your tank is fully cycled when you can dose ammonia to 2 ppm and, within 24 hours, both ammonia and nitrite read 0 ppm, with nitrate present. At this point, your bacterial colonies are robust enough to handle the waste load of fish.\n </li>\n <li>\n <strong>Perform a large water change.</strong> Before adding fish, do a 50 to 80 percent water change to bring nitrate levels down below 20 ppm. Dechlorinate the new water.\n </li>\n <li>\n <strong>Add fish gradually.</strong> Do not stock your entire planned population at once. Add fish in small batches over 2 to 4 weeks, allowing the bacterial colony to scale up to match the increasing bioload.\n </li>\n</ol>\n\n<h2>Week-by-Week Timeline</h2>\n\n<p>Cycling times vary, but here is a general timeline. Note that <strong>Singapore's warm water temperatures (28 to 30 degrees Celsius) accelerate bacterial growth</strong>, often shortening the cycle compared to timelines published by sources in temperate climates.</p>\n\n<h3>Week 1</h3>\n<p>Ammonia remains high (2 to 4 ppm). Nitrite and nitrate read zero. Nothing visible is happening, but bacteria are beginning to colonise your filter media. Be patient and just test daily.</p>\n\n<h3>Week 2</h3>\n<p>Ammonia begins to drop. Nitrite appears and starts climbing. This is an encouraging sign — the first bacterial colony is establishing. You may notice the water becoming slightly cloudy (a bacterial bloom). This is harmless and will clear on its own.</p>\n\n<h3>Week 3</h3>\n<p>Ammonia should be dropping to zero within a day or two of dosing. Nitrite may be very high — readings of 5 ppm or above are common. Nitrate begins to register. You are in the toughest part of the wait; nitrite can seem stubbornly persistent.</p>\n\n<h3>Week 3 to 4</h3>\n<p>Nitrite begins to fall. In Singapore's warm conditions, many fishless cycles complete within 3 to 4 weeks. Test ammonia and nitrite daily — once both read zero within 24 hours of a 2 ppm ammonia dose, you are done.</p>\n\n<h3>Week 4 to 6 (if needed)</h3>\n<p>Some cycles take longer, particularly in cooler water, larger tanks, or tanks with minimal surface area for bacterial colonisation. If you are past week 4 and nitrite is still high, ensure your filter is running properly, check that you are not overdosing ammonia, and confirm there is no chloramine in your water killing the bacteria (always dechlorinate).</p>\n\n<h2>Speeding Up the Cycle</h2>\n\n<h3>Bacterial Starter Products</h3>\n\n<p>Products like Dr Tim's One and Only, Seachem Stability, and Fritz TurboStart 700 contain live nitrifying bacteria. They can significantly reduce cycling time — in some cases to 1 to 2 weeks. However, results vary depending on the product's freshness and storage conditions. Treat these as a helpful supplement, not a guarantee. Always verify with test kit readings before adding fish.</p>\n\n<h3>Seeding from an Established Tank</h3>\n\n<p>The fastest way to cycle a new tank is to transfer filter media, substrate, or hardscape from an already-cycled aquarium. A used sponge filter or a handful of established bio-media placed in your new filter carries billions of beneficial bacteria and can reduce cycling time to days rather than weeks. If you know a fellow hobbyist with a healthy tank, this is the most reliable shortcut available.</p>\n\n<h3>Warm Water Advantage</h3>\n\n<p>Nitrifying bacteria reproduce faster in warmer water. Singapore's ambient temperature of 28 to 30 degrees Celsius is close to the optimal range for bacterial growth, which means your cycle will typically complete faster than the 4 to 8 weeks commonly quoted in European or North American guides. If you are running a heater, set it to 28 to 30 degrees Celsius during cycling to maximise this advantage, then adjust to your target temperature before adding fish.</p>\n\n<h2>Cycling a Planted Tank</h2>\n\n<p>If you are setting up a planted aquarium with aquasoil (such as ADA Amazonia or Tropica Soil), the cycling process overlaps with — and is partially driven by — the substrate itself.</p>\n\n<p>Aquasoils leach ammonia during the first 2 to 4 weeks. This ammonia serves as a natural food source for nitrifying bacteria, effectively cycling the tank without needing to add an external ammonia source. The process works as follows:</p>\n\n<ol>\n <li>Set up your tank with aquasoil, hardscape, plants, filter, and lighting</li>\n <li>Perform large water changes (50 percent or more) every other day for the first 2 weeks to keep ammonia from reaching levels that damage plants</li>\n <li>Continue testing ammonia and nitrite — reduce water change frequency as levels stabilise</li>\n <li>Once ammonia and nitrite consistently read zero without frequent water changes, the cycle is complete</li>\n</ol>\n\n<p>The advantage of this approach is that your plants are growing and establishing while the cycle progresses. Fast-growing stem plants like Hygrophila and Water Wisteria absorb ammonia directly, further reducing toxicity and suppressing algae during the vulnerable startup period.</p>\n\n<h2>Signs of Trouble</h2>\n\n<ul>\n <li><strong>Ammonia is not dropping after 2 weeks:</strong> Check that your filter is running and has adequate biological media. Ensure you are dechlorinating your water — chloramine kills nitrifying bacteria. Verify that water flow is passing through the filter media, not bypassing it.</li>\n <li><strong>Nitrite has been high for weeks with no sign of dropping:</strong> Very high nitrite (above 5 ppm) can actually inhibit the bacteria that convert it. Perform a 50 percent water change to dilute the nitrite, then continue the process.</li>\n <li><strong>The cycle seemed complete but crashed:</strong> This can happen if you added too many fish at once, overwhelming the bacterial colony, or if you rinsed your filter media in chlorinated tap water (always rinse in old tank water during water changes).</li>\n</ul>\n\n<h2>Fish-In Cycling: A Last Resort</h2>\n\n<p>Fish-in cycling — adding fish to an uncycled tank and hoping the bacteria establish before the fish suffer — is stressful for the fish and risky. If you have already added fish before cycling, you need to manage the situation carefully:</p>\n\n<ul>\n <li>Test ammonia and nitrite daily</li>\n <li>Perform 25 to 50 percent water changes whenever ammonia or nitrite exceeds 0.25 ppm</li>\n <li>Use Seachem Prime to detoxify ammonia and nitrite between water changes (it binds them for 24 to 48 hours)</li>\n <li>Feed sparingly — less food means less ammonia</li>\n <li>Add a bacterial starter product to accelerate the process</li>\n</ul>\n\n<p>This is survivable but not ideal. Fishless cycling is always the better path.</p>\n\n<h2>Start Your Tank the Right Way</h2>\n\n<p>Patience during cycling pays dividends in long-term tank health. A properly cycled aquarium is more stable, more forgiving of minor mistakes, and provides a far better environment for your fish and plants.</p>\n\n<p>Need help getting started? Our <a href=\"/shop/\">shop</a> carries test kits, bacterial starters, filter media, and everything else you need for a successful cycle. If you would rather have experts handle the entire setup and cycling process for you, our <a href=\"/custom/\">custom aquascaping service</a> includes tank maturation as part of the package — you receive a fully cycled, planted, and ready-to-stock aquarium.</p>\n\n<p><a href=\"/contact/\">Contact us</a> if you have questions about cycling your specific setup. We are happy to troubleshoot.</p>\n\n</article>\n---END---\n\n
Learn how to set up a stunning planted aquarium in Singapore. Expert guide covering PUB water parameters, tropical temperatures, substrates, CO2 and more.\nCONTENT:\n<article>\n\n<p>Setting up a planted aquarium in Singapore comes with a unique set of advantages and challenges that most international guides simply do not address. Our tropical climate means year-round warmth — great for many aquatic plants, but limiting for others. Our tap water, treated by PUB and increasingly supplemented with NEWater, has specific parameters you need to understand before planting your first stem.</p>\n\n<p>This guide draws on years of hands-on aquascaping experience in Singapore to give you a clear, practical roadmap from empty tank to thriving underwater garden.</p>\n\n<h2>Understanding Singapore's Water Parameters</h2>\n\n<p>Before you buy a single plant, you need to know what is coming out of your tap. PUB-treated water in Singapore typically has the following characteristics:</p>\n\n<ul>\n <li><strong>pH:</strong> 6.5 to 8.5 (varies by district, but commonly around 7.0 to 7.5)</li>\n <li><strong>General Hardness (GH):</strong> 1 to 4 dGH — relatively soft water</li>\n <li><strong>Carbonate Hardness (KH):</strong> 1 to 3 dKH — low buffering capacity</li>\n <li><strong>Chloramine:</strong> Present in all PUB-treated water (not just chlorine)</li>\n <li><strong>TDS:</strong> Approximately 50 to 150 ppm</li>\n</ul>\n\n<p>A critical point many beginners miss: Singapore uses <strong>chloramine</strong>, not just chlorine, to disinfect its water supply. Chloramine does not off-gas by simply leaving water to stand overnight. You must use a water conditioner that specifically neutralises chloramine — products like Seachem Prime or API Tap Water Conditioner are readily available here and handle this effectively.</p>\n\n<p>The relatively soft, slightly acidic to neutral water is actually excellent news for planted tanks. Most popular aquarium plants originate from soft-water tropical environments and will thrive in Singapore tap water with minimal adjustment. If you keep demanding plants like Rotala or Tonina species, you may not need to add an RO system at all.</p>\n\n<h3>What About NEWater?</h3>\n\n<p>NEWater — Singapore's high-grade reclaimed water — is blended into our reservoir supply. It is ultra-pure before blending, so its main effect is keeping our tap water on the softer side. For planted aquarium purposes, this is a benefit rather than a concern. Just treat your water for chloramine as described above, and you are good to go.</p>\n\n<h2>The Tropical Temperature Challenge</h2>\n\n<p>Singapore's ambient temperature sits between 28 and 32 degrees Celsius for most of the year. Without a chiller, your aquarium water will hover around 28 to 30 degrees Celsius — and can climb above 31 degrees Celsius during heat waves or if the tank receives afternoon sunlight.</p>\n\n<p>This matters because many popular aquarium plants from temperate or subtropical regions prefer 22 to 26 degrees Celsius. At Singapore temperatures, you will notice:</p>\n\n<ul>\n <li>Faster plant metabolism, meaning higher nutrient and CO2 demand</li>\n <li>Lower dissolved oxygen in warmer water</li>\n <li>Some cold-preference plants (certain Bucephalandra varieties, some mosses) may struggle or melt</li>\n <li>Algae grows more aggressively in warm, nutrient-rich water</li>\n</ul>\n\n<h3>Do You Need a Chiller?</h3>\n\n<p>For a beginner planted tank, a chiller is not essential — but it does expand the range of plants and livestock you can keep successfully. If your budget allows, a chiller set to 25 to 26 degrees Celsius will make your planted tank significantly easier to manage. Brands like TECO and Hailea are popular among Singapore aquascapers. If you are running a smaller nano tank, a clip-on fan blowing across the water surface can reduce temperatures by 2 to 3 degrees through evaporative cooling.</p>\n\n<p>For a first planted tank, focus on <strong>heat-tolerant species</strong>: Java Fern, Anubias, Cryptocoryne, Hygrophila, and Vallisneria all handle Singapore temperatures without complaint.</p>\n\n<h2>Choosing Your Tank Size</h2>\n\n<p>A common beginner mistake is starting too small. While nano tanks (under 20 litres) are tempting for their compact footprint in Singapore's HDB flats and condominiums, they are far less forgiving of mistakes. Water parameters fluctuate rapidly in small volumes, and dosing errors are amplified.</p>\n\n<p>For your first planted aquarium, aim for <strong>60 to 90 centimetres in length</strong> (approximately 60 to 160 litres). This size provides enough water volume for stability while remaining manageable for maintenance. A standard 60cm tank fits comfortably on most furniture and is the most popular size among local aquascapers.</p>\n\n<p>Browse our <a href=\"/shop/\">online shop</a> for a selection of rimless tanks and aquascaping-ready setups suited to Singapore homes.</p>\n\n<h2>Substrate: The Foundation of a Planted Tank</h2>\n\n<p>Your substrate choice will affect your planted tank for its entire lifespan. For a first planted aquarium, these are the most accessible and effective options available in Singapore:</p>\n\n<ul>\n <li><strong>ADA Amazonia II:</strong> The gold standard among aquasoil substrates. Rich in nutrients, buffers pH downward, and supports root-feeding plants exceptionally well. Requires a cycling period as it leaches ammonia initially.</li>\n <li><strong>Tropica Aquarium Soil:</strong> A strong alternative to ADA, with somewhat less initial ammonia leaching. Widely stocked by local fish shops.</li>\n <li><strong>GlasGarten Environment Aquarium Soil:</strong> A newer option gaining popularity in Singapore for its balance of nutrient content and manageable cycling period.</li>\n <li><strong>Inert substrates (sand, gravel):</strong> If you plan to keep only epiphyte plants like Anubias and Java Fern attached to hardscape, an inert substrate works fine and avoids the cycling complications of aquasoil.</li>\n</ul>\n\n<p>For most beginners, an aquasoil like ADA Amazonia or Tropica Soil is the recommended choice. The initial ammonia spike requires patience — you cannot add fish immediately — but the long-term benefits for plant growth are substantial.</p>\n\n<h2>Lighting for Planted Tanks in Singapore</h2>\n\n<p>Modern LED lighting has made planted tank illumination far more accessible and energy-efficient. For Singapore's market, these brands offer strong performance at various price points:</p>\n\n<ul>\n <li><strong>Chihiros (WRGB II, WRGB II Slim, C Series):</strong> Excellent value with app-controllable dimming and scheduling. The WRGB II series is a favourite among local aquascapers for medium to high-light setups.</li>\n <li><strong>Twinstar (S Series, E Series):</strong> Premium build quality and colour rendition. Popular for display tanks and competition aquascapes.</li>\n <li><strong>ADA Aquasky:</strong> The benchmark in design and performance, though at a higher price point. Worth considering if you are investing in a long-term display.</li>\n <li><strong>ONF Flat One Plus:</strong> A sleek, high-performance option with excellent PAR output for demanding plants.</li>\n</ul>\n\n<p>For a beginner, a Chihiros WRGB II Slim or C Series LED is hard to beat. Run your lights for <strong>6 to 8 hours per day</strong> initially — not longer. Excessive light without adequate CO2 and nutrients is the fastest route to an algae outbreak, especially in Singapore's warm water.</p>\n\n<h2>CO2 Injection: Is It Necessary?</h2>\n\n<p>Technically, you can grow many plants without CO2 injection. But if you want a lush, densely planted aquascape with vibrant colours, pressurised CO2 makes an enormous difference.</p>\n\n<p>A basic pressurised CO2 setup consists of:</p>\n\n<ol>\n <li>A CO2 cylinder (common sizes in Singapore: 1 litre to 3 litres for smaller tanks, 5 litres for larger setups)</li>\n <li>A dual-stage regulator with solenoid valve and bubble counter</li>\n <li>Tubing and a diffuser (ceramic or inline)</li>\n <li>A timer to sync CO2 injection with your lighting period</li>\n</ol>\n\n<p>Aim for a CO2 concentration of approximately <strong>30 ppm</strong> during the lighting period. A drop checker filled with 4 dKH reference solution should show a green colour — yellow means too much CO2 (dangerous for fish), blue means too little.</p>\n\n<p>In Singapore, CO2 cylinder refills are affordable and widely available at local aquarium shops. A 3-litre cylinder typically lasts 2 to 4 months on a 60cm tank, depending on your injection rate.</p>\n\n<h2>Filtration</h2>\n\n<p>For a planted aquarium, a canister filter is the preferred choice. It sits outside the tank, keeping the interior clean and uncluttered, and provides excellent biological filtration volume. Popular models in Singapore include the Oase BioMaster series, Eheim Classic range, and the ADA Super Jet.</p>\n\n<p>Flow rate should turn over your tank volume approximately <strong>4 to 6 times per hour</strong>. For a 60-litre tank, that means a filter rated at 240 to 360 litres per hour. Good circulation ensures CO2 and nutrients reach all your plants and prevents dead spots where algae can take hold.</p>\n\n<h2>Planting and Initial Setup Steps</h2>\n\n<ol>\n <li><strong>Hardscape first:</strong> Place your rocks and driftwood before adding substrate. This lets you visualise the layout and make adjustments without disturbing planted areas.</li>\n <li><strong>Add substrate:</strong> Slope it higher toward the back (5 to 8 cm at the rear, 3 to 4 cm at the front) for visual depth.</li>\n <li><strong>Fill partially:</strong> Add water to about 5 cm depth — enough to keep plants moist during planting without floating them away.</li>\n <li><strong>Plant from foreground to background:</strong> Start with carpeting plants at the front, mid-ground species next, and tall stem plants at the rear.</li>\n <li><strong>Fill slowly:</strong> Use a colander or plate to break the water flow and avoid disturbing your planting.</li>\n <li><strong>Start filtration and CO2:</strong> Turn on your filter, begin CO2 injection, and set your light timer.</li>\n <li><strong>Cycle before adding fish:</strong> If using aquasoil, allow 2 to 4 weeks for the ammonia spike to subside. Test your water parameters before introducing livestock. (See our <a href=\"/blog/how-to-cycle-aquarium/\">complete cycling guide</a> for detailed instructions.)</li>\n</ol>\n\n<h2>First-Week and First-Month Care</h2>\n\n<p>The first month is critical. Perform <strong>50% water changes every other day</strong> for the first two weeks if using aquasoil — this helps flush excess ammonia and reduces the risk of algae. After two weeks, you can reduce to 2 to 3 water changes per week, and eventually settle into a weekly routine once the tank is established.</p>\n\n<p>Begin dosing liquid fertilisers after the first week. A comprehensive all-in-one fertiliser like APT Complete or Tropica Premium Nutrition covers most needs for a moderately planted tank. If you are running high light and CO2, consider a more targeted dosing approach with separate macro and micro nutrient solutions.</p>\n\n<h2>Getting Expert Help in Singapore</h2>\n\n<p>If you would rather skip the trial and error, our <a href=\"/custom/\">custom aquascaping service</a> handles everything from tank selection and hardscape design to planting and ongoing maintenance. We work with clients across Singapore to create planted aquariums tailored to their space, budget, and skill level.</p>\n\n<p>Have questions about getting started? <a href=\"/contact/\">Reach out to us</a> — we are always happy to help fellow aquascaping enthusiasts in Singapore find their footing.</p>\n\n</article>\n---END---\n\n